
I recently constructed a felt inspired by a Netter illustration for a friend. The construction was posted on social media with the final piece receiving quite a few comments and likes.
I thought I would break down the process so that you could see how it was done.
Needle felting is an ancient craft that matts together wool fibres by repeatedly stabbing them with a very sharp barbed needle. It can be very therapeutic at the end of a day.

The Netter image started with some wool and a piece of fabric.
The footprint of the image was shaped out using this core wool and felted to the fabric to create a layer of wool fibres on top of the fabric that other structures could be felted onto.


The structures of the collar bone and mandible were built up to mark out the area into which everything else had to fit.
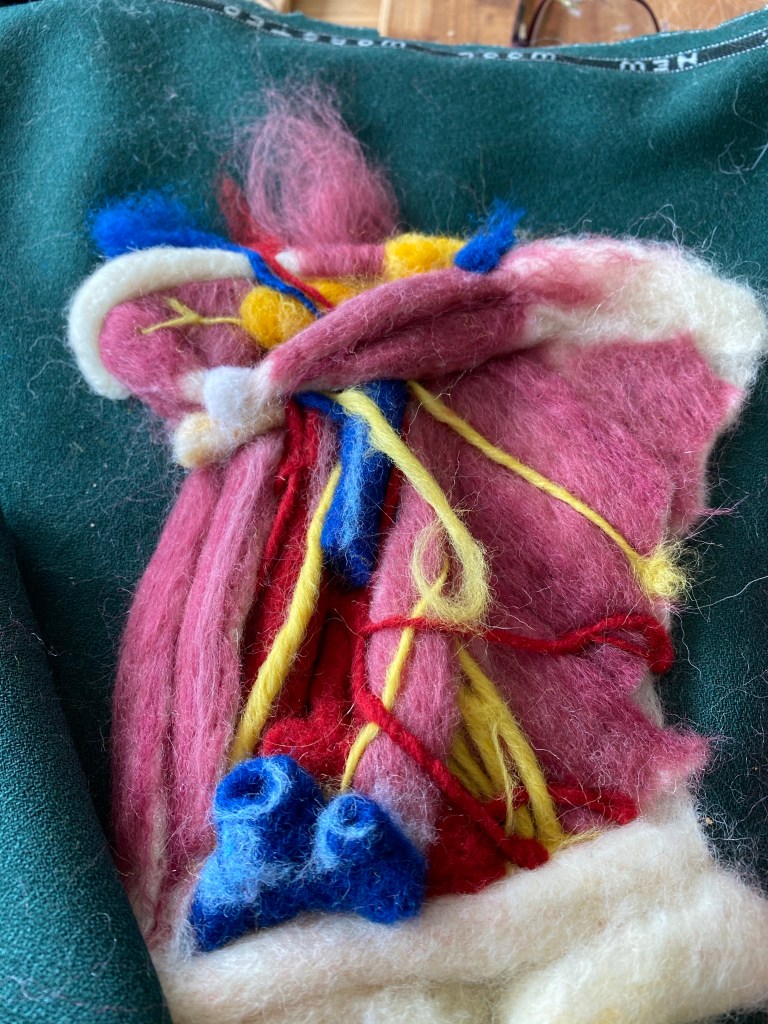
The idea was to make all of the structures within the neck and to build it up like a reverse dissection.
This meant the blood vessels had to be made. I started out making these on pencils but as I progressed with the construction most things had to be trimmed down to size.
Muscles are not a solid block of colour and so three variations of ‘fleshy’ tones had to be mixed up to gives the muscles their colour.


The major blood vessels of the neck acted as landmarks for the other structures, so these were inserted first with a darker background to ensure no white would show through in the final image.

All of the muscles were constructed and then laid out to ensure everything would be close to the correct places before fixing.

Each muscles was then coloured with a selection of the three fleshy tones to give them extra shape and shading. Working from the deepest structure, the muscles were added onto the fabric.
The finer blood vessels and nerves were small strands of coloured topps wool that were anchored in place and then twisted to produce a fine fibre before tacking into position along the course with a fine felting needle.
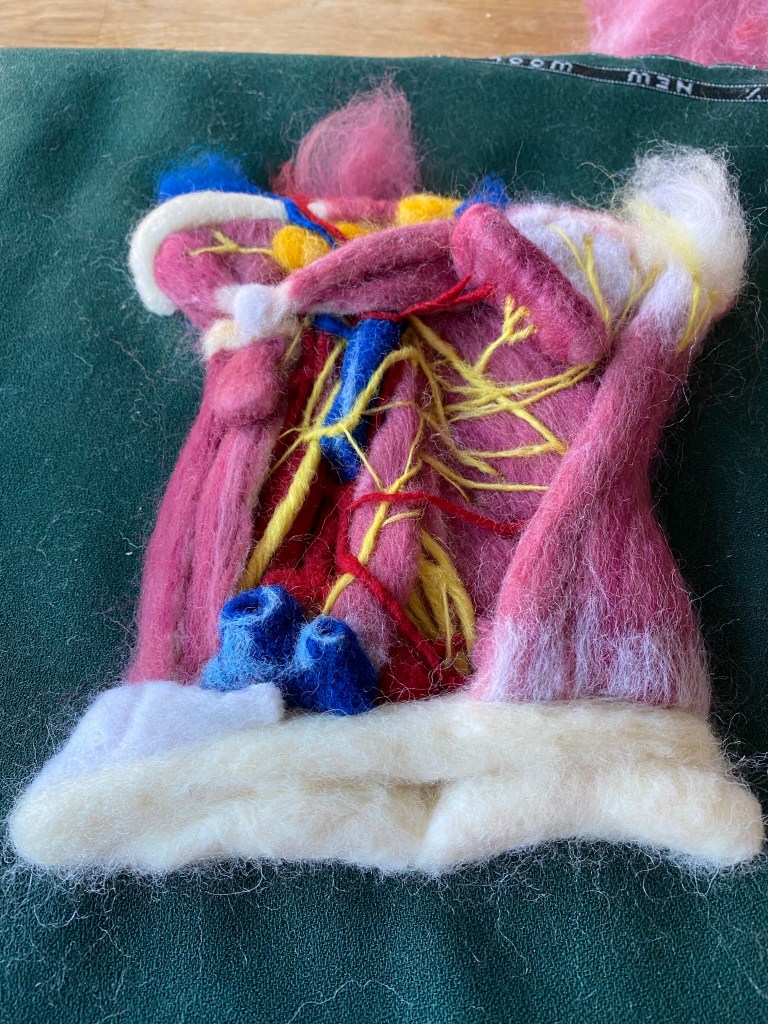
The adding of the hyoid bones with the digastric attachments and the trapezius framed the rest of the dissection.
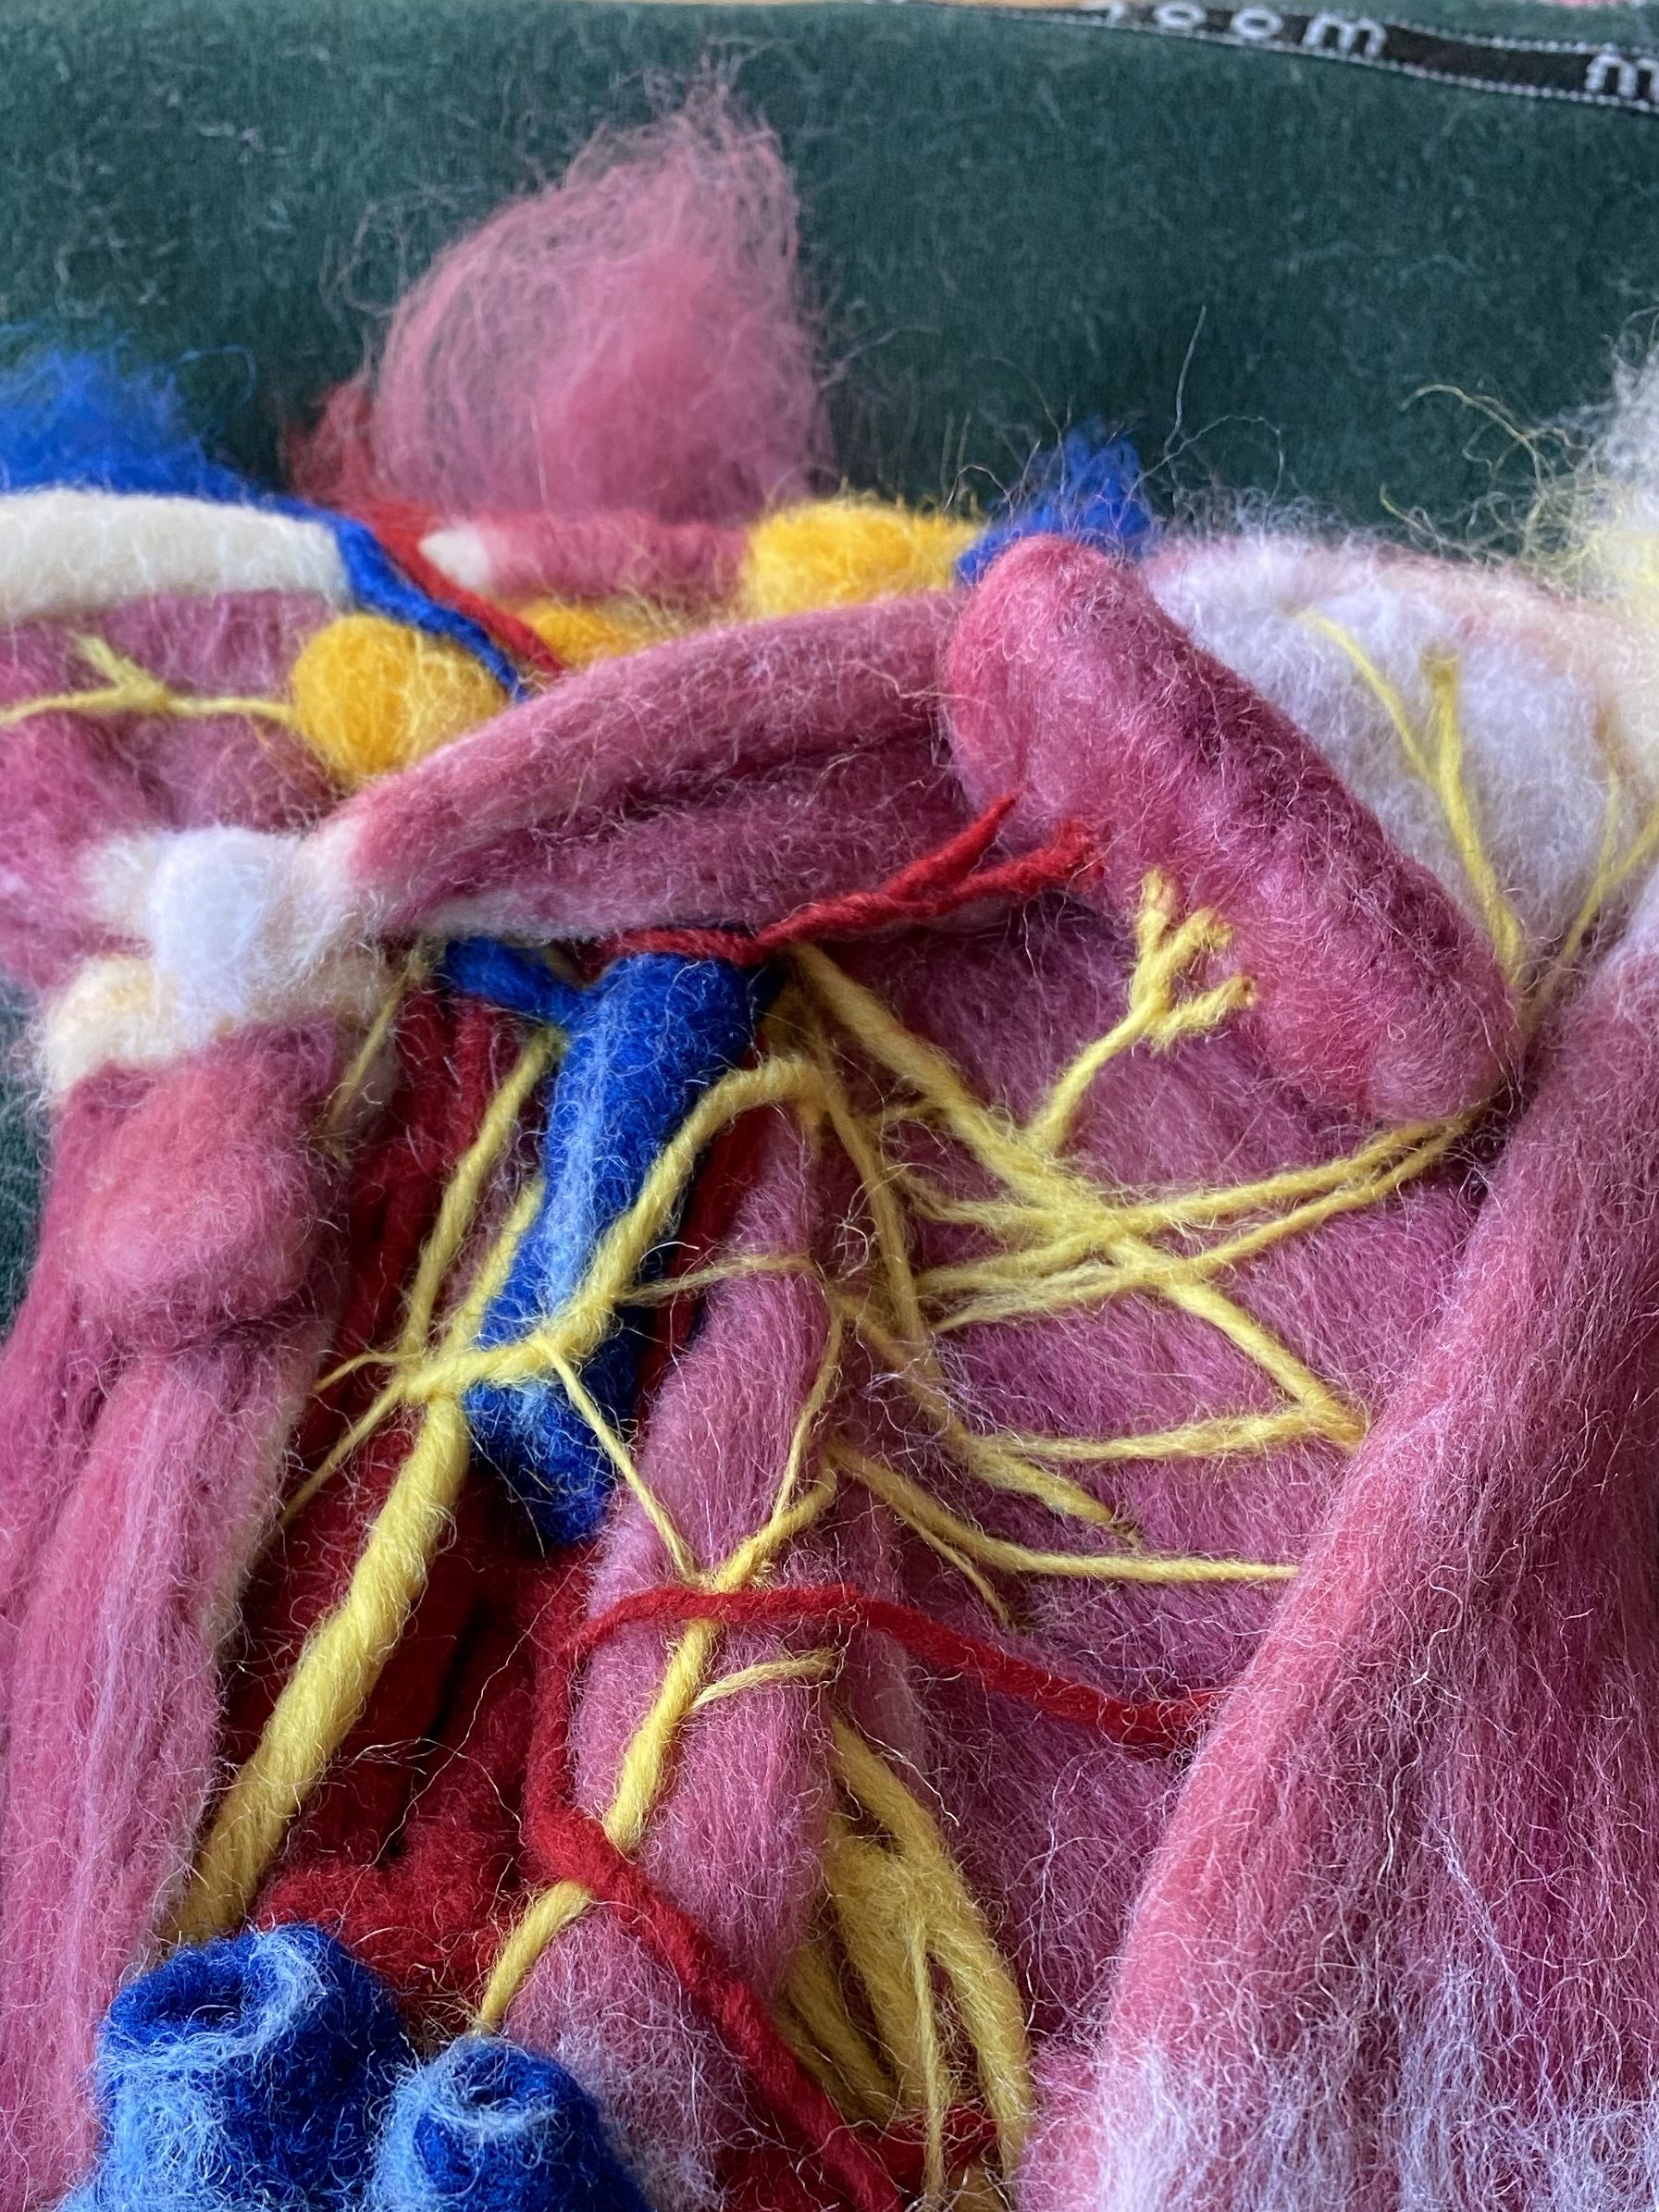
Wool can be felted into any shape. The direction of the needle stabs dictates which dimension will reduce in size. Utilising this it was possible to felt the reflected cut end of the sternocleidomastoid muscle and the innervation and blood supply on its deeper surface.
The collar bone and deltoid area was built up to finish the bottom of the picture and the submandibular gland, adipose layer and flesh finished the image at the top edge, before it was sprayed with hairspray, framed and sent off to its new home.

